
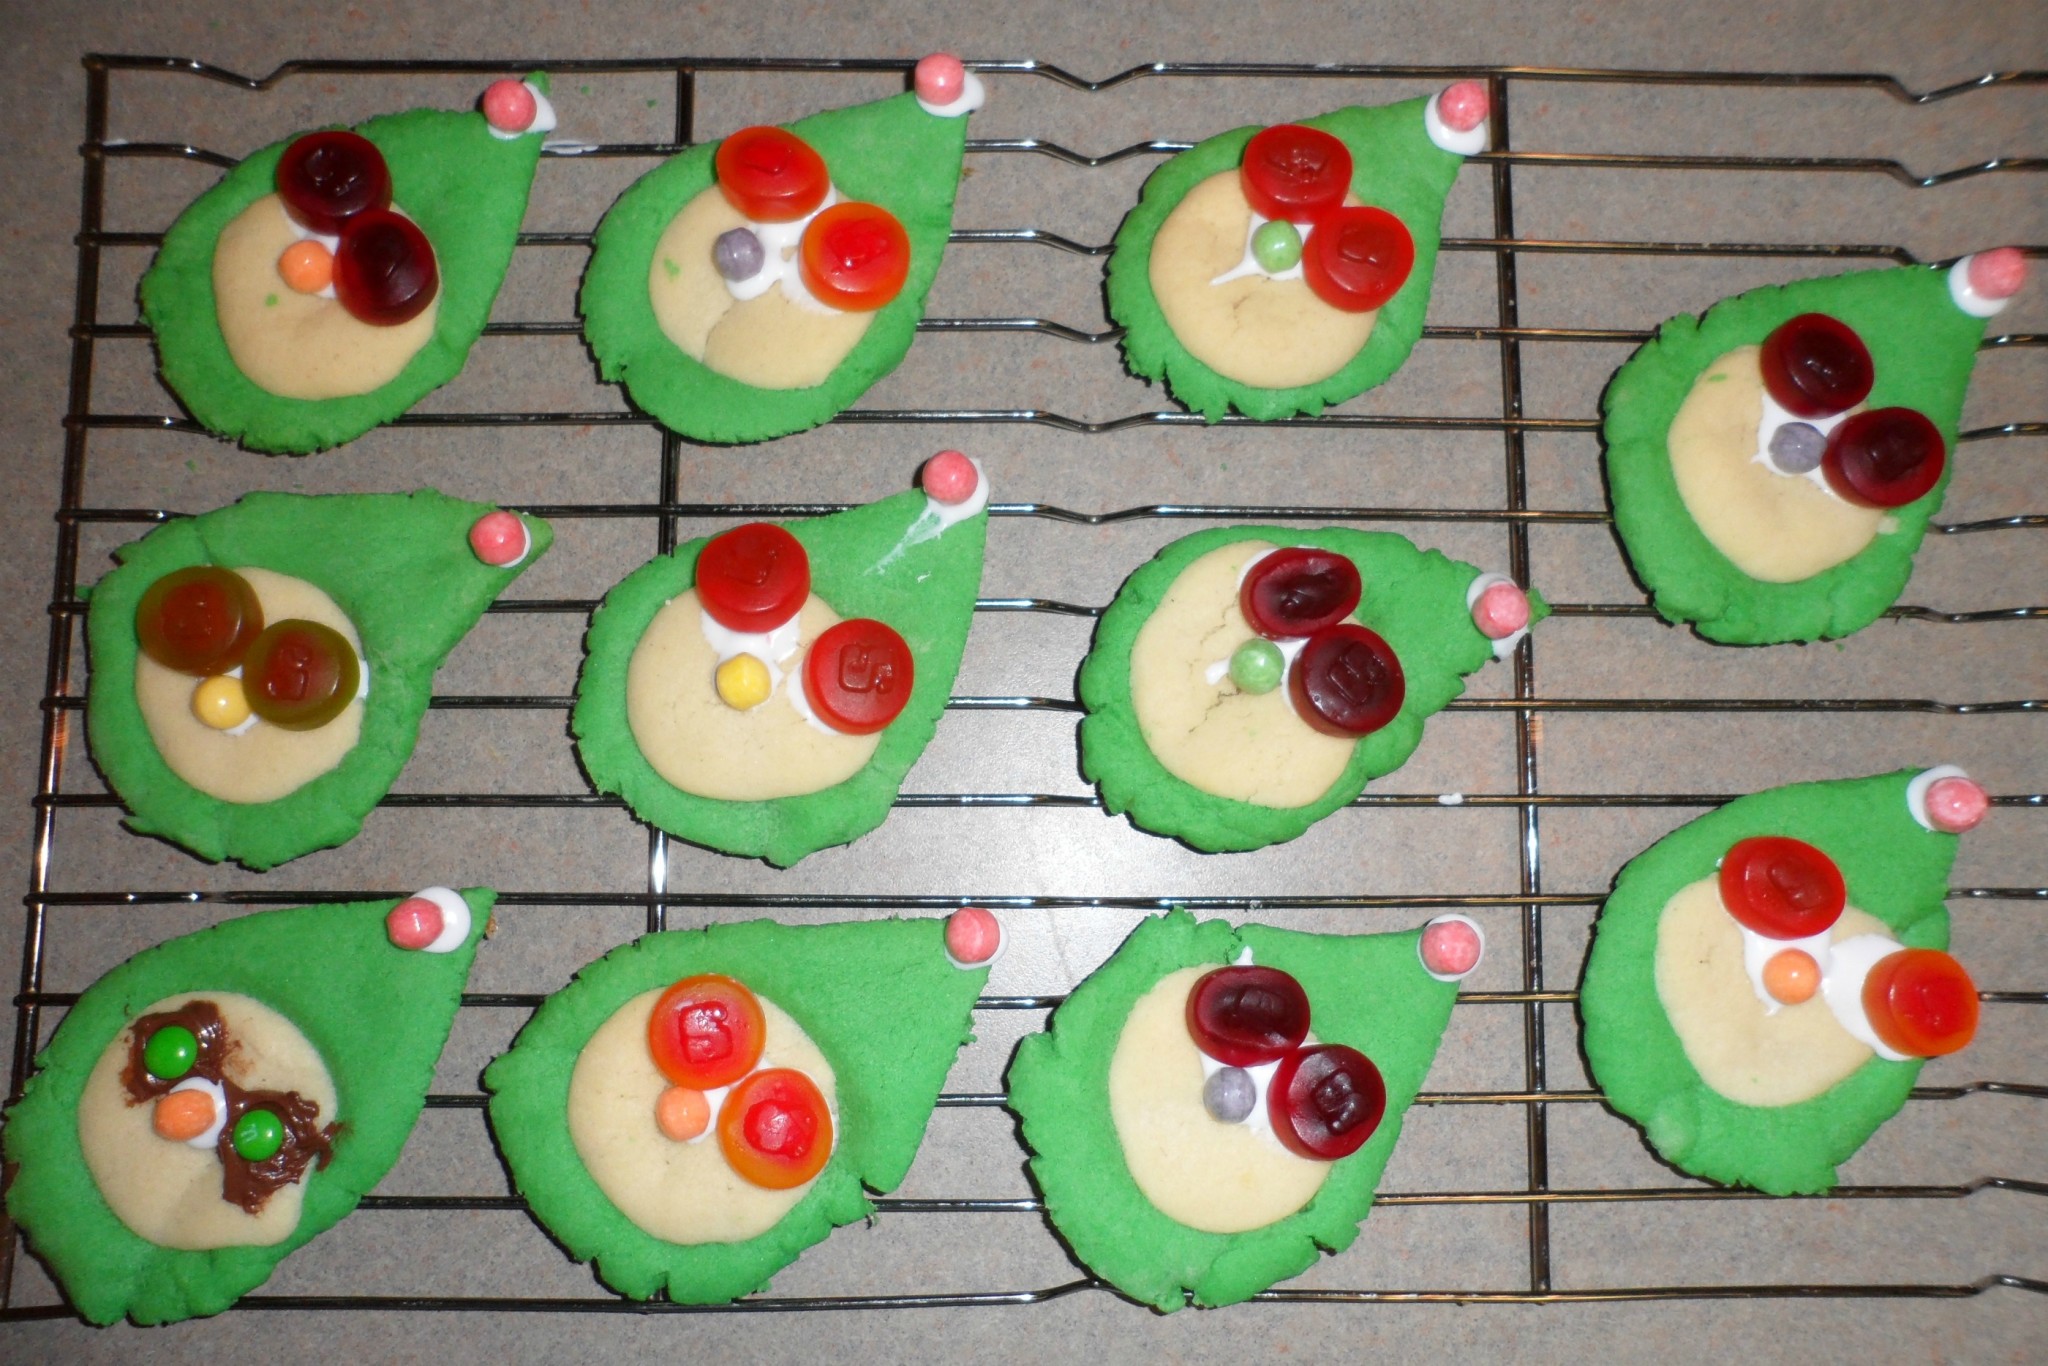
I’m no pastry chef, as the pictures below will attest, but I’ve had loads of fun in the kitchen today baking up Lanny and Wayne (Prep & Landing) cookies with my little girl. She’s been sick this week, so a day of cooking and crafting was the perfect pick-me-up.
If you’re not familiar with Santa’s techno-savvy, elite elfin team, you can catch the latest episode, “Prep & Landing: Naughty vs. Nice,” online right here. (It airs tonight on ABC at 8/7 Central, btw.) Anyway, Lanny and Wayne are two of Santa’s best helpers. They are the ones who keep track of who’s been naughty and who’s been nice and keep Santa’s database up-to-date. They are also assigned to sort of rehabilitate the naughties and steer them back onto the nice list.
I found several activities at DisneyFamily.com to bring Lanny and Wayne to our home this Christmas. They have printable 3D papercrafts, Lanny’s holiday paper hat, Christmas Carol’s coal cupcakes and wrappers, a printable activity book, and much more! To make the cookies, we purchased prepared sugar cookie dough, a tube of white decorator icing and assorted candies. Then, we followed these instructions:
1) Cut out the elf head/hat template.
2) Divide cookie dough in half, coloring one half green and setting the other half aside in the fridge. (If using store-bought dough, knead in a little flour to stiffen the dough so it doesn’t spread when it’s baked.)
3) On a flour-dusted sheet of waxed paper, roll out green dough to ¼ inch thickness and cut out elf head/hats. Use spatula to transfer to ungreased cookie sheet.
4) Use a 2-inch diameter round cookie cutter to cut out the faces. Place unused green circles on separate baking sheet.
5) Now roll out plain dough on flour-dusted waxed paper to ¼ inch thickness and cut out 2-inch circles from it. Insert those plain dough circles into the green elf head/hats on cookie tray.
6) Place cookies tray(s) into oven and bake according to recipe or package directions. Allow to cool on baking tray two minutes before transferring to wire rack to cool completely.
7) Decorate as shown. The Disney Family recipe calls for small chocolate wafer cookies for the goggles, but I couldn’t find anything small enough, so I used Starburst Gummibursts for the eyes. Also, instead of a jelly bean, I used Mini Chewy Sweet Tarts for the nose and ball on the cap. If you have them, you can add a pinch of yellow sprinkles to half of them to make Lanny’s tuft of hair.
Here’s how ours turned out.
We also gave the elf on the shelf a little Disney kick! We downloaded the Prep & Landing elves template and gathered the following supplies: scissors, straight pins, felt (green, tan, black and red), pipe cleaners or chenille sticks (red, white and green), cool-temp hot glue gun, brown yarn, cotton ribbon or strip of felt, faux gems, red pompom, scraps of green fleece or felt, green ribbon and cardboard tissue tube. Then, we followed these simple instructions:
1) Cut out the template and designated pieces of felt.
2) For each elf, hot glue the upper edge of one of the two body shapes atop the lower edge of one of the head/hat pieces. Then, bend a pipe cleaner into an inverted V-shape and glue it onto the joined felt.
3) Make arms for each elf by first twisting together a white and a red pipe cleaner (I used shimmery red and silver) and then hot gluing it to the center of a felt arm piece.
4) Apply more glue along the edge of the felt below the pipe cleaner and then fold the felt onto it, enclosing the pipe cleaner. Bend the ends of the pipe cleaner to resemble mini candy canes.
5) Glue one set of arms to each elf body.
6) Next, make legs. For each one, cut a 5-inch length of inch-wide cotton ribbon or felt and glue the sides together at the very bottom, pinching them to create an “ankle” that is half the width.
7) Then glue two red felt elf shoes together with the ankle sandwiched between them as shown. (FYI, the template only tells you to cut out 4, but you need to cut out 8!)
8) Attach a pair of legs to each of the remaining two body shapes by hot gluing the tops to the inner felt. Then glue the body (with the attached legs) to the matching body/arm assembly along the sides and neck, leaving the bottom open.
9) For each elf, glue the felt lenses in place for goggles. Then glue the goggles to the upper third of the face, as shown.
10) Glue on the nose so that the top slightly overlaps the bridge of the goggles. Now glue the face onto the remaining head/hat piece.
Note: If you want your elf to have hair, simply sandwich a few wisps of cotton yarn between the upper face and the hat when gluing the pieces together.
11) Glue the assembled face to the body, sandwiching a pair of elf ears between the two green felt head/hat pieces. Stick on the goggle gems and hot glue a red pompom to the top of the hat.
12) For the finishing touches, glue a strip of fleece or felt trim (we used gliterry felt) around the bottom of each elf body. Add ribbon belts and faux gem buttons and belt buckles.
13) To help the elves sit upright, cut a short ring from a paper towel tube and insert it in the body. For the slim elf, cut another ring from the tube and slit it all the way up one side. Then re-roll the ring more tightly so that it’s narrow enough to insert in the body. Set them on a shelf to observe your kids’ naughty—I mean NICE—behavior!
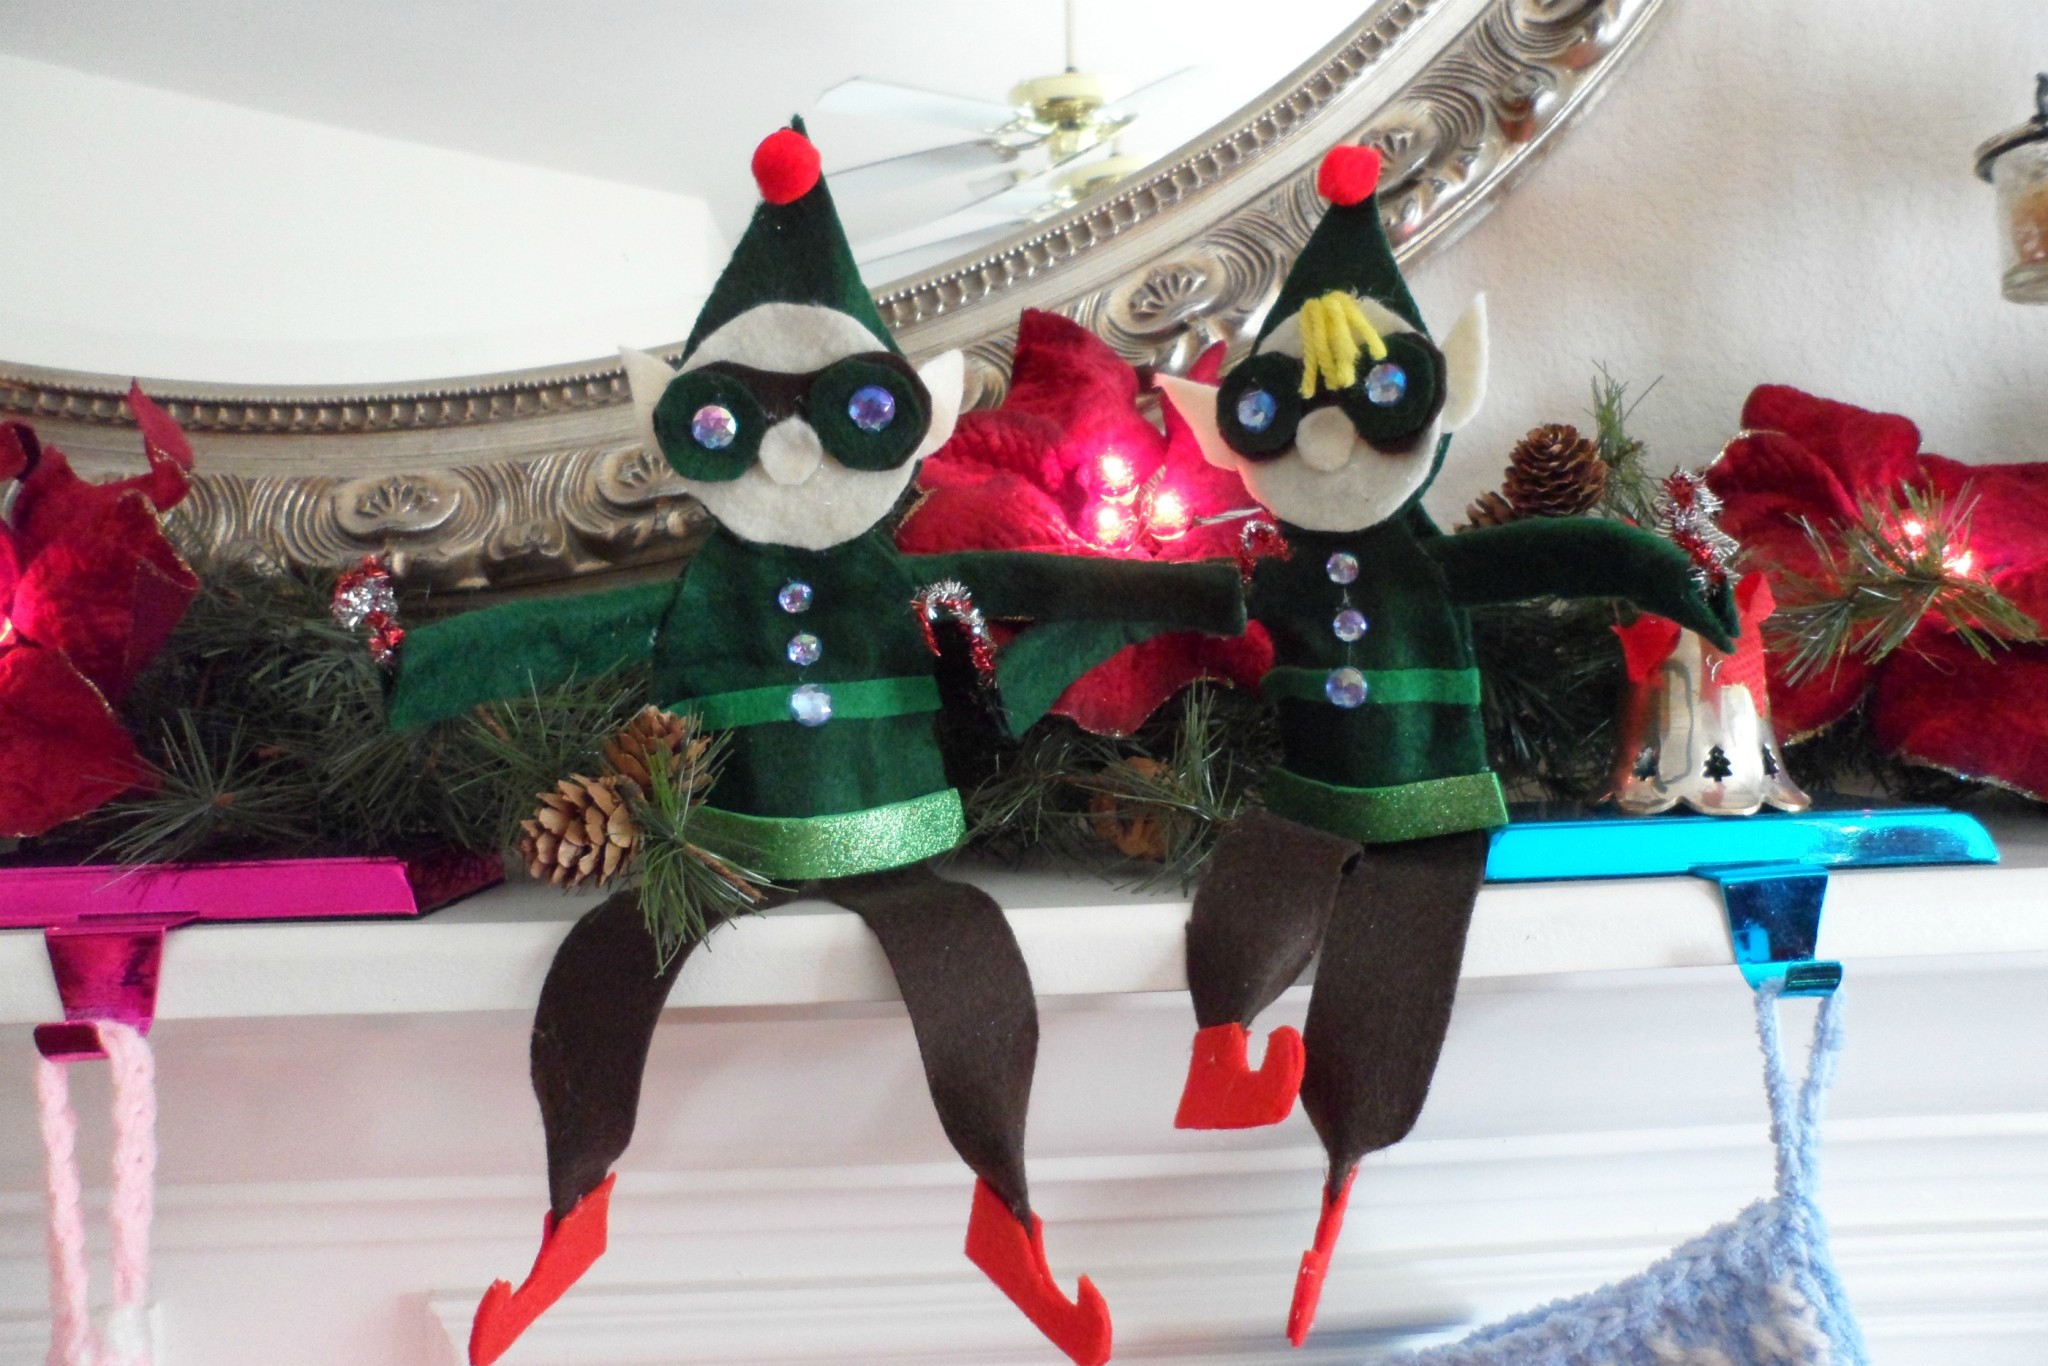
The felt elves were a bit time consuming, but they turned out great (better than the cookies, as you can see). I’ve been working on elf projects so much today that I think turning into one!
You can get full instructions and see detailed photos of all Prep & Landing related crafts and recipes at DisneyFamily.com
P.S. If you have any suggestions for getting green food coloring stains off my fingers, I’d greatly appreciate your advice in the comments below. Thanks!
MERRY CHRISTMAS!

Let our friends at Destinations to Travel help you book your next Disney Vacation. They are the preferred Travel Agency of Chip and Company and Disney Addicts, and who we use ourselves.
Get started below for your FREE No Obligation Quote.
Book With our friends at Destinations to Travel
For the BEST in Disney, Universal, Dollywood, and SeaWorld Theme Park News, Entertainment, Merchandise & More follow us on, Facebook, Instagram, and Youtube. Don't forget to check out the Chip and Company Radio Network too!

Joy dish soap works to great to remove the food coloing
So cute! We just bought Prep and Landing (the original) and my kids love it! We haven’t seen Naughty vs.Nice yet.